Create Issuer Template
An issuer template (called Credential Issuer definition in the UI) holds the general configuration shared by every credential template grouped under it.
What is an issuer template?
An issuer template is the shared identity every credential of that issuer is issued under: its name, logo, technical configuration key, interoperability profile, and supported languages. It also decides how the wallet holder is identified before issuance, which kinds of credential offer are handed out, and how long an offer stays valid. You create one issuer template per issuing identity, then attach one or more credential templates to it, so every credential of that issuer looks and behaves consistently.
Navigate to issuer templates
Go to Settings → Templates (under Issuer).

The table lists all configured issuer templates with their Name, Description, and Technical key. Click any row to open the issuer template, or click Add to create a new one.
Issuer template form
An issuer template has two tabs:
- Issuer configuration - identity, OpenID parameters, and display settings
- Credential templates - the credential templates that use this issuer. This tab stays disabled until the required fields on the first tab are filled in. If you switch tabs with unsaved changes, you are asked whether to save them first.
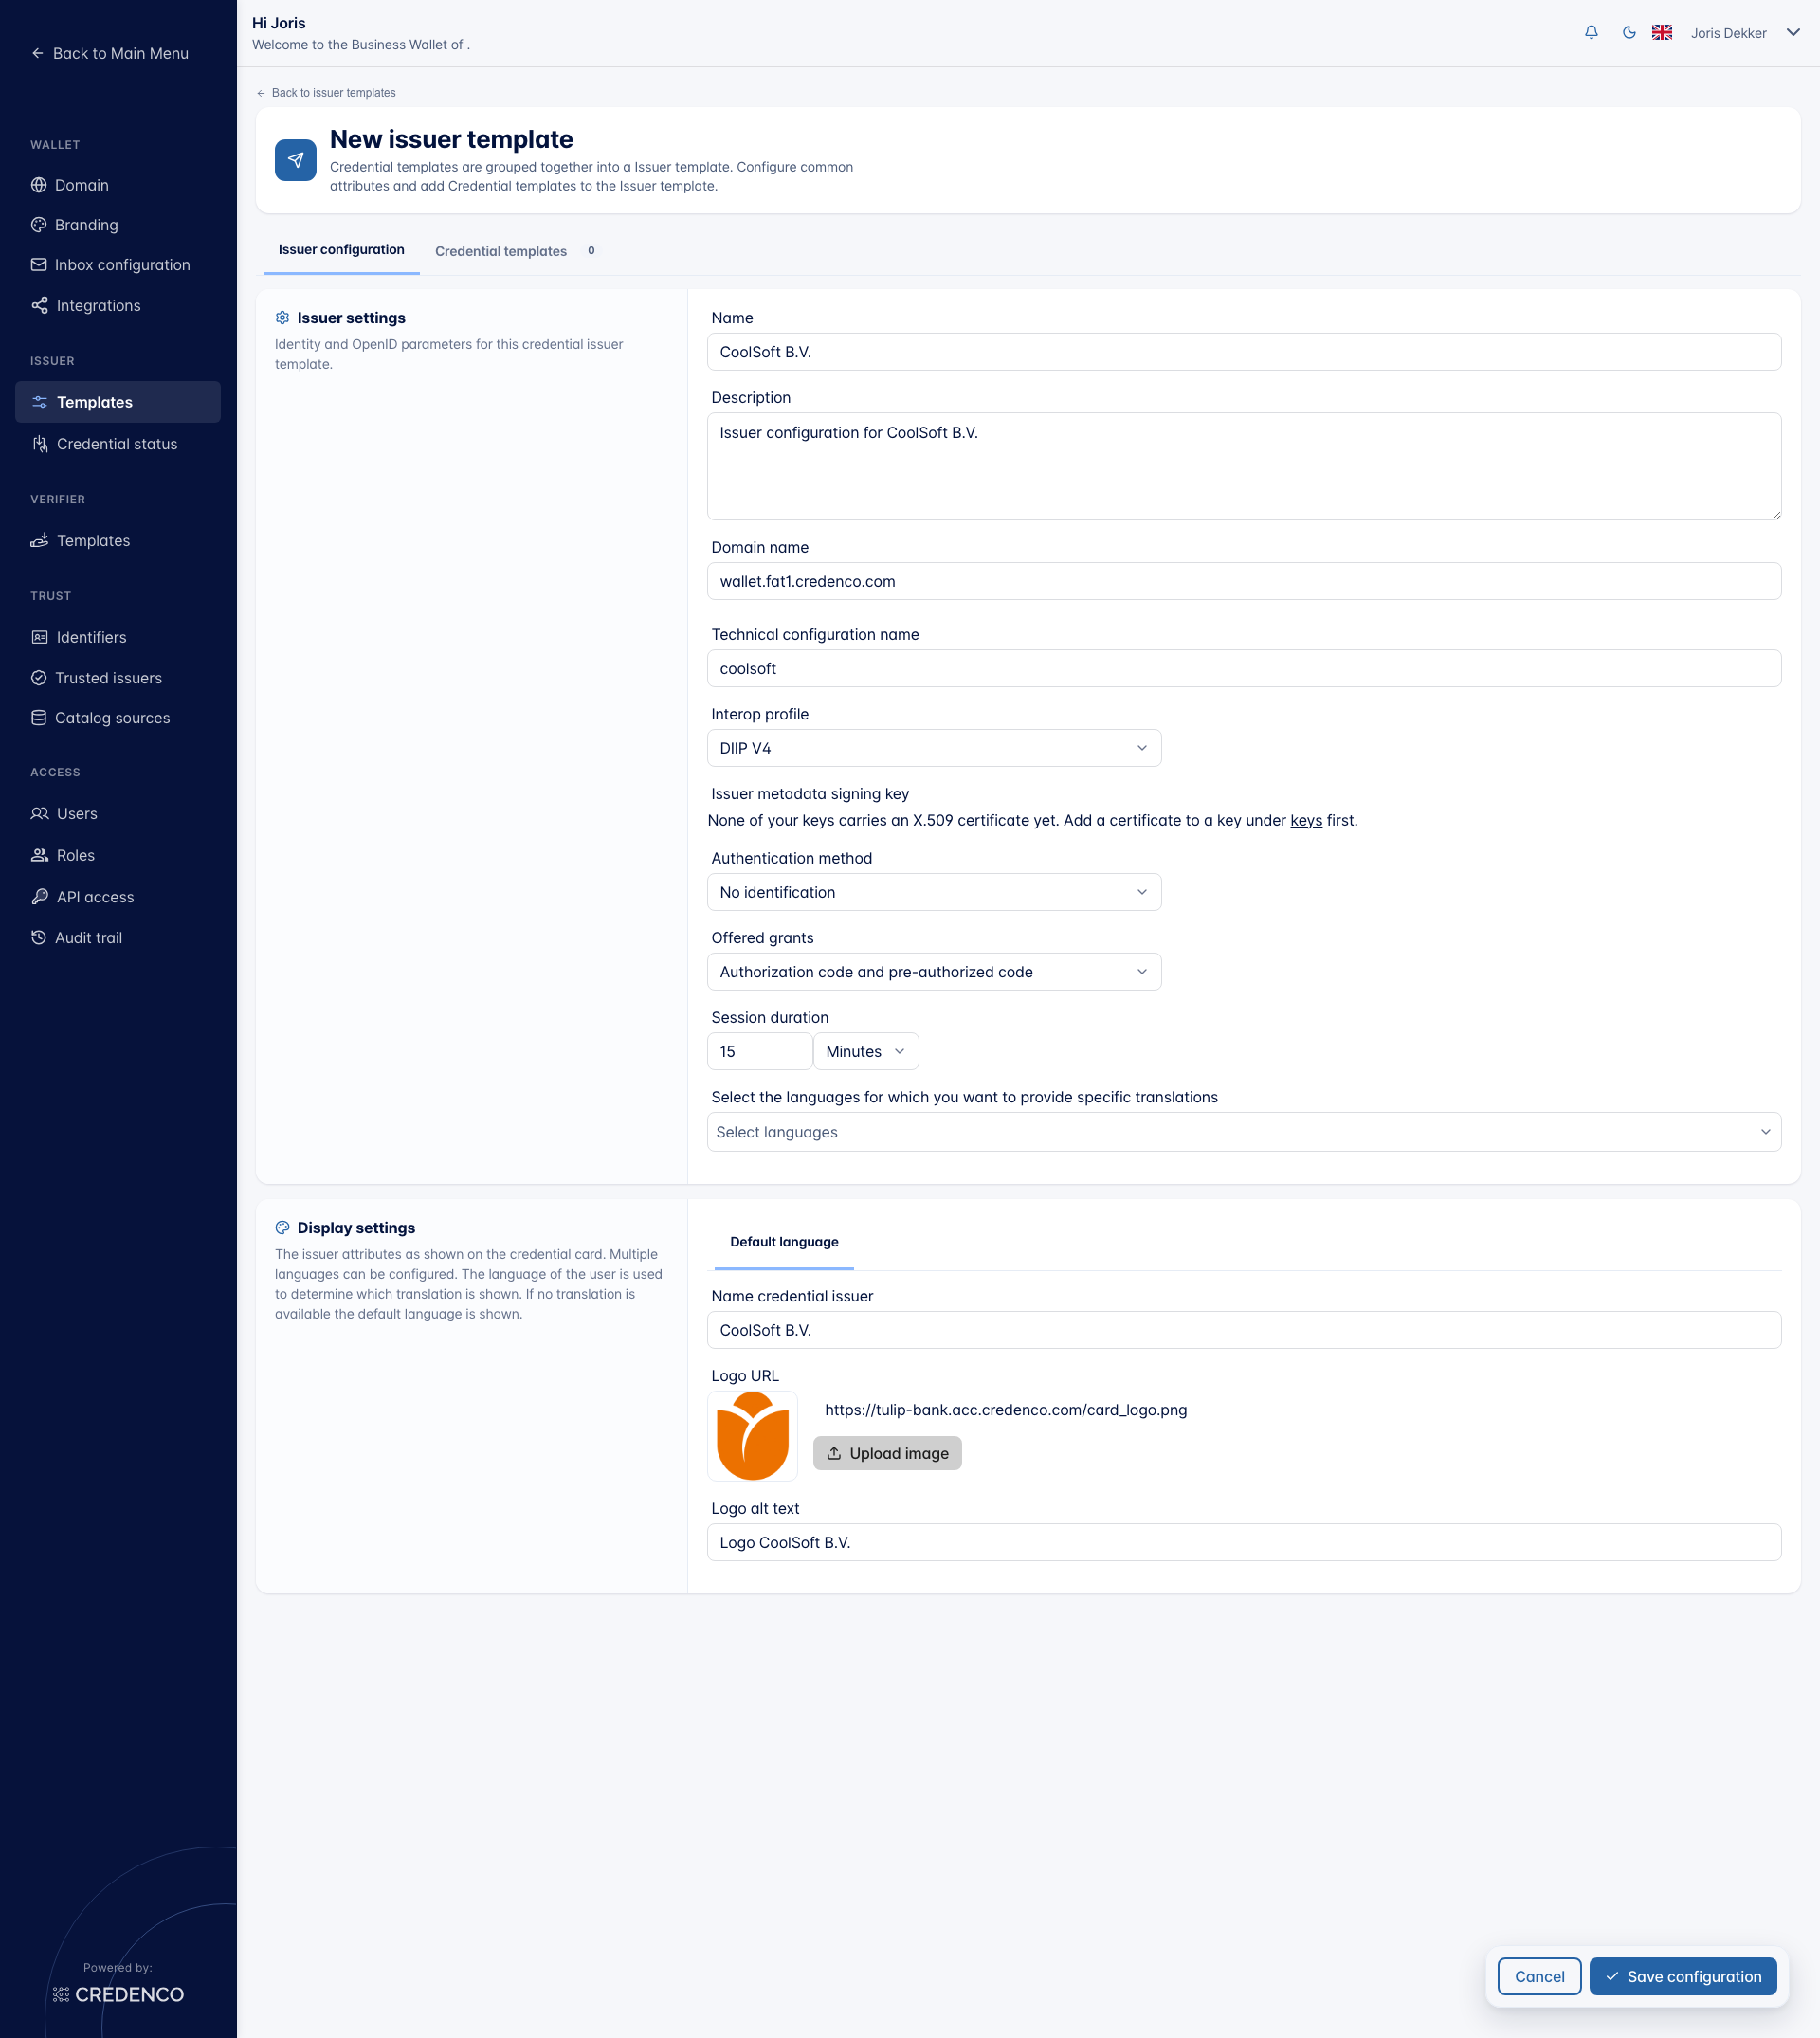
Issuer settings
Configure how this issuer identifies itself and how it issues. Fields marked with an information icon show a short explanation when you click the icon.
-
Name - A logical name of the configuration. Shown in the UI only. Not included in the credentials. Required.
-
Description - A short description that helps you find the configuration later. Shown in the UI only.
-
Domain name - The hostname under which wallets reach this issuer, for example
wallet.example.com. Enter only the hostname, withouthttps://or a path. Leave it empty to use the default domain. -
Technical configuration name - The name used in the public configuration URL of this issuer (e.g. the OpenID credential issuer well-known endpoint). Only letters, digits,
-and_are allowed. Required. Once the template is saved, the full public URL is shown under the field with a button to copy it. Changing the name changes that URL, so integrations and credential offers that use the old URL stop working. -
Interop profile - The interoperability profile that defines the protocol versions used between the issuer and the wallet. Pick from:
DIIP V3DIIP V4(the default for a new template)DIIP V5HAIP
See the DIIP specification for details on the DIIP profiles, or the OpenID4VC High Assurance Interoperability Profile for HAIP. Use the latest version unless you have specific requirements to choose an older one.
-
Issuer metadata signing key - The key this issuer signs its OpenID4VCI metadata with. See Issuer metadata signing key.
-
Authentication method - How the wallet holder is identified before the credential is issued. See Authentication method.
-
Offered grants - Which kinds of credential offer this issuer hands out. See Offered grants.
-
Session duration - How long a holder has to collect the credential after an offer is created. See Session duration.
-
Select the languages for which you want to provide specific translations - Pick the extra languages you want to provide specific translations for. The default language is always present and is used when no specific translation is configured.
Issuer metadata signing key
By default an issuer serves its OpenID4VCI metadata as plain JSON. A wallet that requires signed metadata reads the X.509 certificate on the signing key to decide whether it trusts the issuer.
- Only keys that carry an X.509 certificate can be chosen. If none of your keys has one yet, the field shows a link to the keys page (Settings → Identifiers) where you can add a certificate to a key first.
- The field is optional. To go back to unsigned metadata, select the placeholder option (Select the key to sign the issuer metadata with) to clear the key, then save.
- When at least one key with a certificate exists and you select the HAIP interop profile without a signing key, a warning appears under the dropdown: the metadata is served unsigned, and wallets in an ecosystem that requires signed metadata will not trust the issuer.
- If a key that was set earlier (for example through the API) carries no certificate, a warning tells you to choose a key with a certificate.
- The field is only shown if your role allows reading keys.
Authentication method
The authentication method decides how the wallet holder is identified before the credential is handed over.
| Option | What it does |
|---|---|
| No identification | The default. The credential is issued without identifying the holder first. |
| External page | The holder is sent to an authentication page you run yourself. Fill in Issuer user interface URL with the URL of that page. |
| Presentation of credentials | The holder must present credentials before issuance, for example a PID. Select the Verifier template that defines what must be presented. It is required for this option. Business wallets present the credentials automatically. |
| Desk confirmation | The holder is identified at a desk: the holder's phone shows a 6-digit code, which the desk operator confirms. The confirmation is not part of the Business Wallet screens: your desk application has to confirm it through the issue API (the Confirm an issue process at a desk endpoint). Without such an integration the issuance never completes. |
| DigiD | The holder identifies by logging in with DigiD. |
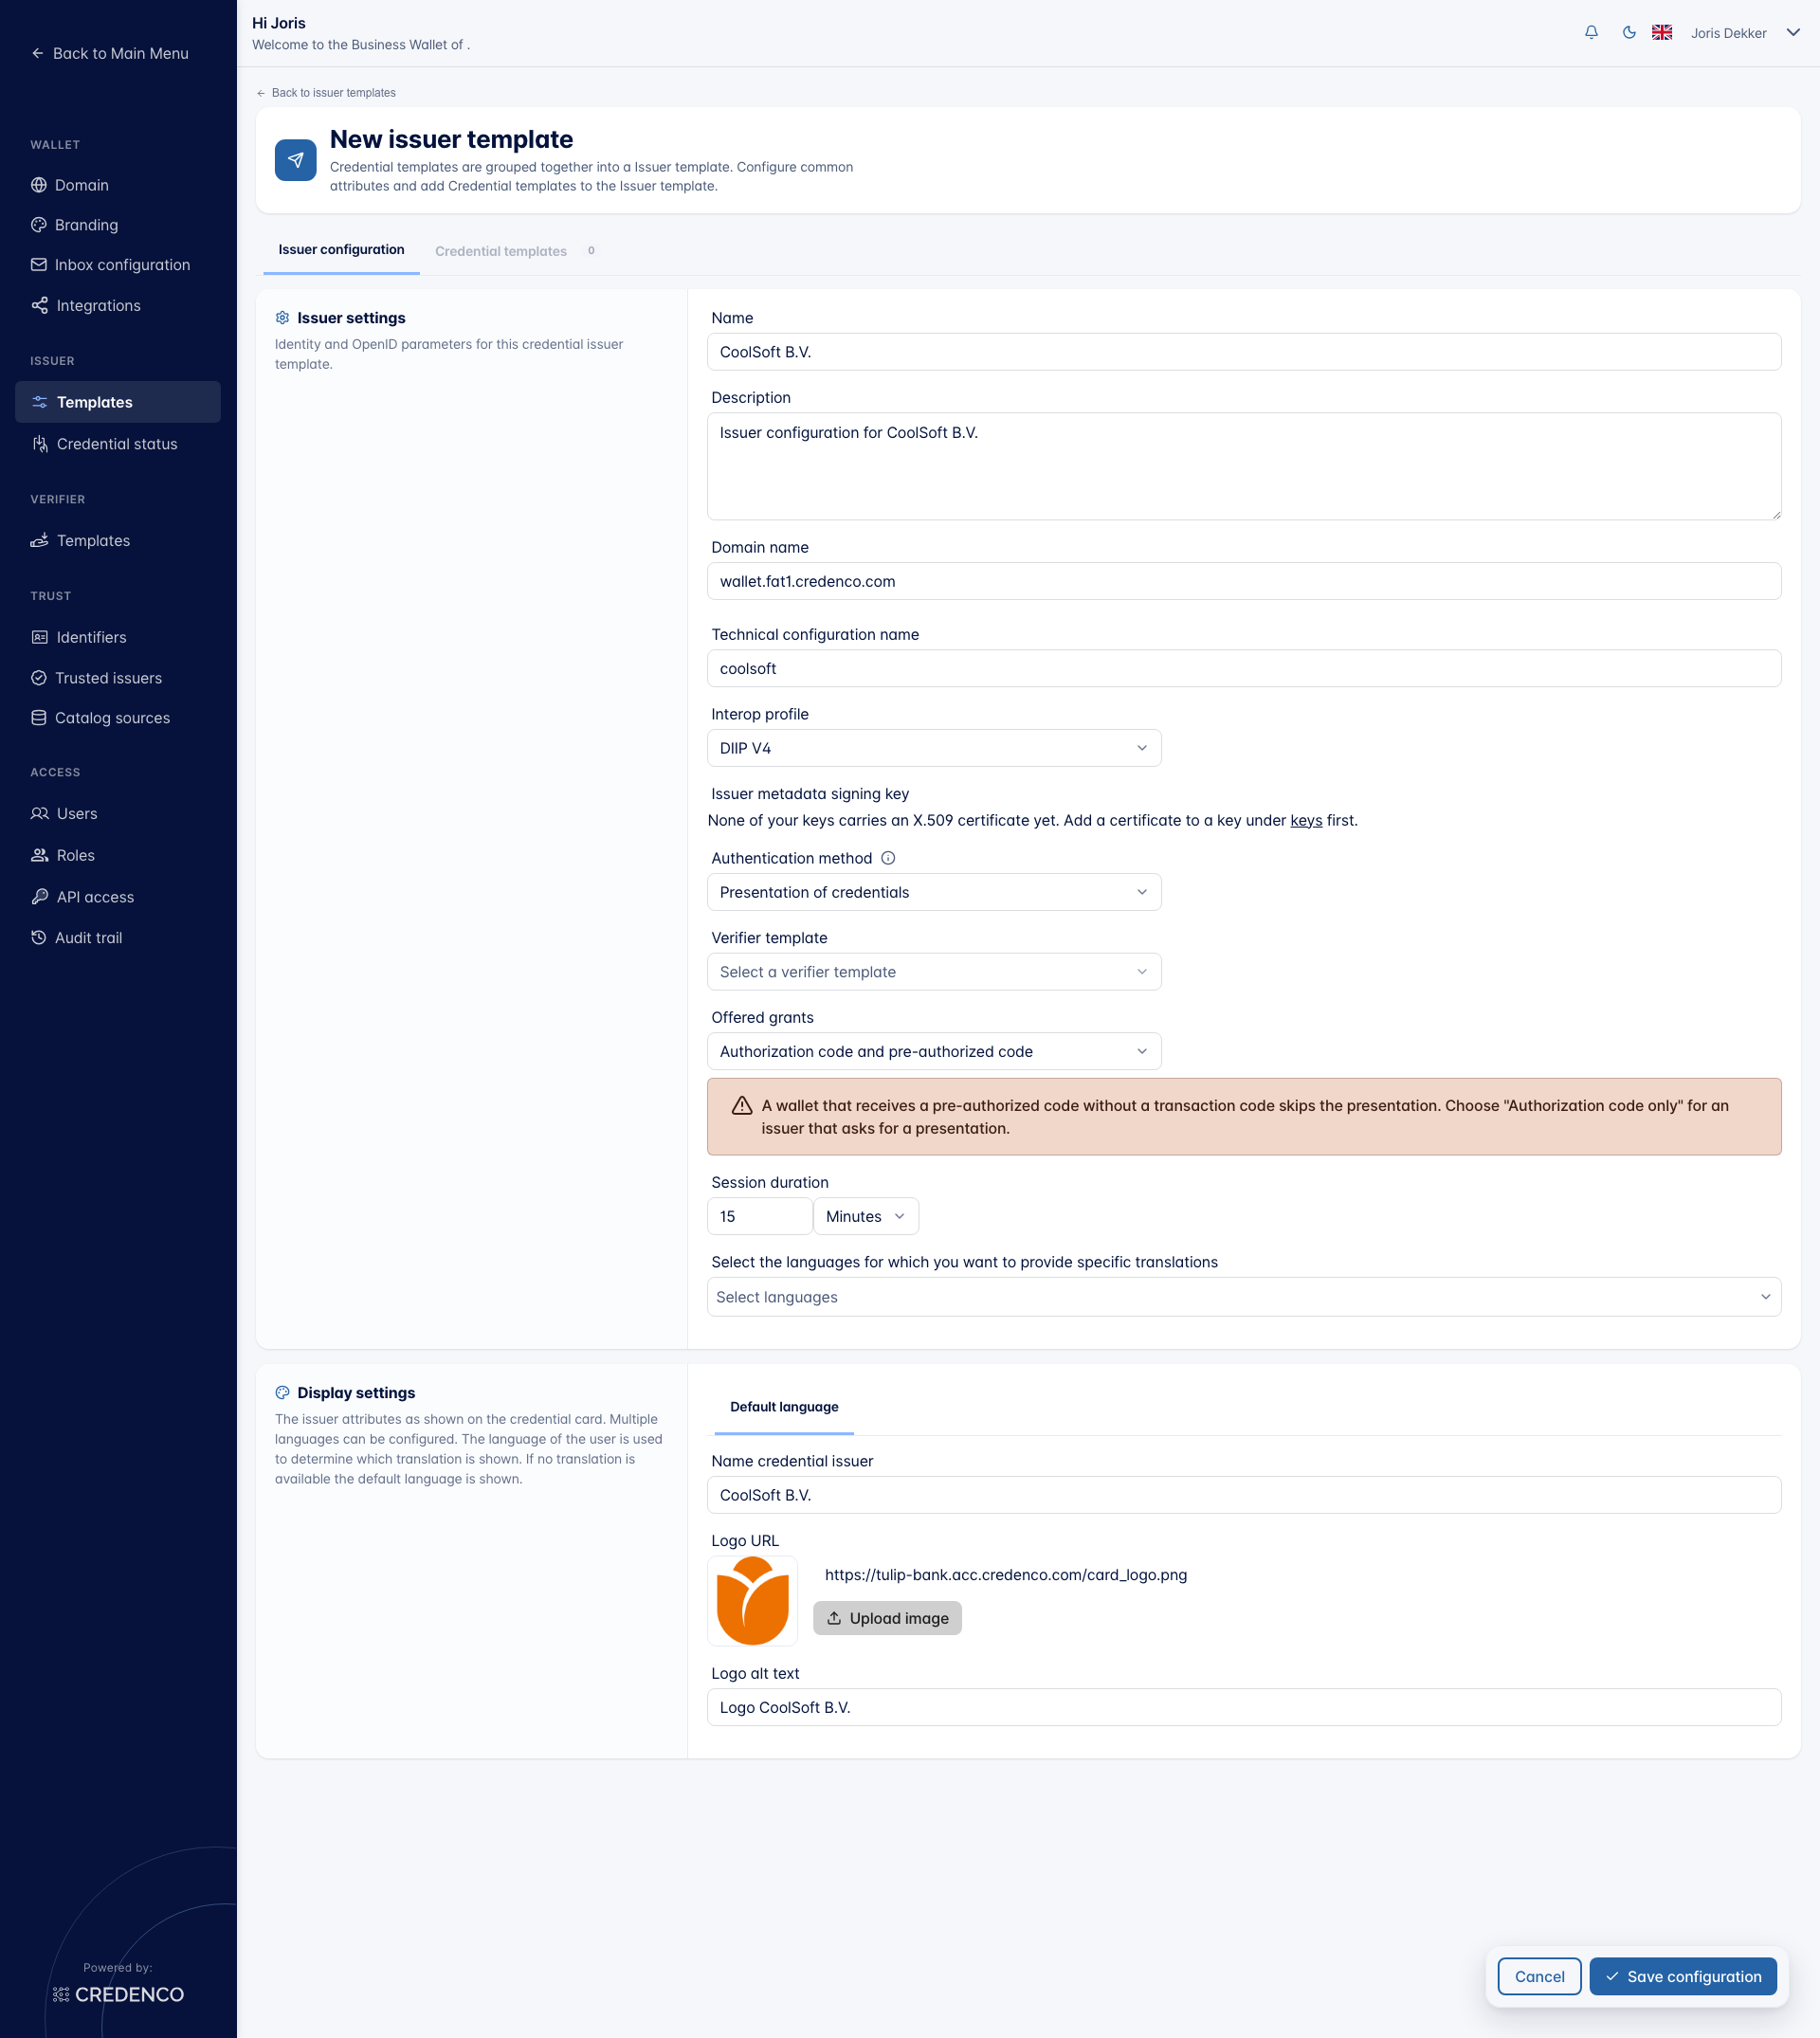
Offered grants
Offered grants decide which kind of credential offer the issuer hands out.
- Authorization code and pre-authorized code - The default. The wallet can use either grant.
- Authorization code only - The holder goes through the identification first, then the credential is issued.
- Pre-authorized code only - The credential is issued straight away, without an identification step.
A wallet takes a pre-authorized code whenever one is offered, and then skips the identification. Therefore:
- With Presentation of credentials, the screen warns you when the offered grants are anything other than Authorization code only.
- With Desk confirmation or DigiD, saving is refused unless the offered grants are Authorization code only.
Session duration
How long a holder has to collect the credential after an offer is created. After that the offer expires. Enter a number and pick a unit (Minutes, Hours or Days). The duration must be between 1 minute and 7 days; the default is 15 minutes.
Display settings
Display settings control how the issuer appears on the credential card. They can be configured per language; the Default language tab is always present.
- Name credential issuer - The issuer name as shown on the credential card. Required for every language.
- Logo URL - The URL of the logo. As an alternative, click Upload image, or drop an image on the preview tile next to the field (it reads Drop or click), to upload a logo. Accepted formats are PNG, JPEG, GIF and WebP, up to 5 MB. The logo may be shown on the credential card.
- Logo alt text - The alternative text for the logo, used for accessibility. It is shown when the logo cannot be loaded.
Save or delete
Click Save configuration at the bottom of the form to apply your changes, or Cancel to discard them.
To remove an issuer template entirely, click Delete in the top right of the Issuer configuration tab and confirm. Deleting cannot be undone, and it is only possible when no credential templates and no issued credentials exist for the issuer template. Remove the credential templates first.
You need the Issuer templates (Change) permission to add, edit, or delete issuer templates.